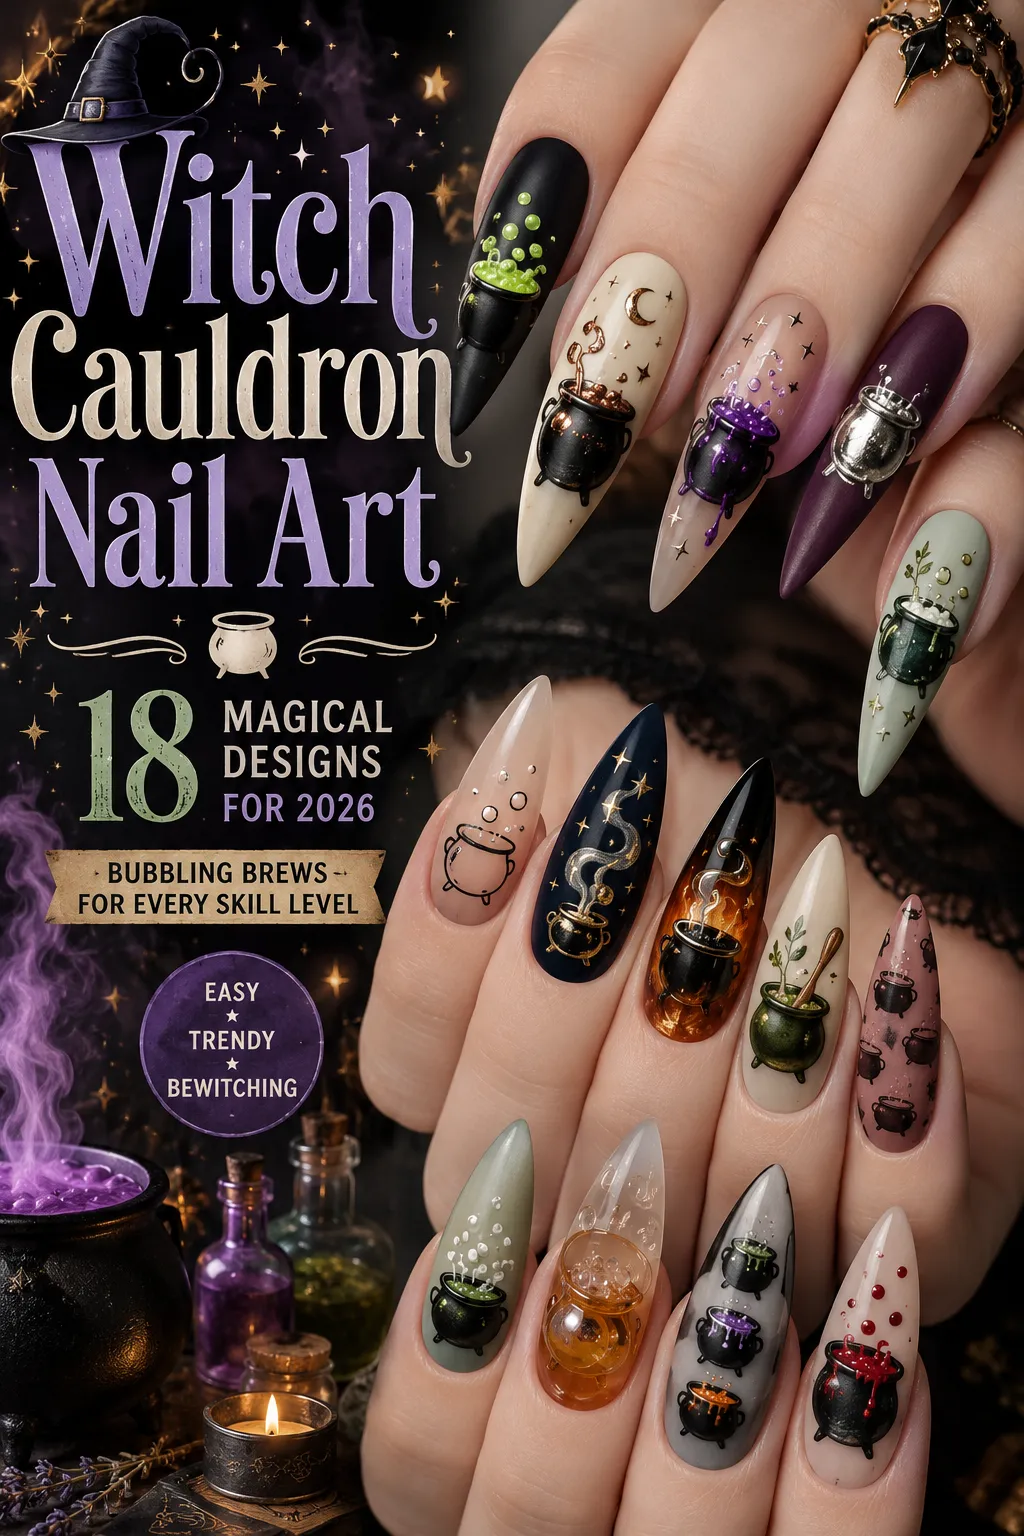
18 Witch Cauldron Nail Art Designs: Bubbling Brews for Every Skill Level
By  Tasleem akhtar
• Published August 19, 2026
Focus keyword: witch cauldron nail art
Meta title: 18 Witch Cauldron Nail Art Designs — Bubbling Brew Nails for 2026
Meta description: Eighteen witch cauldron nail art designs with full step-by-step directions — glowing brews, chrome cauldrons, minimalist line art and 3D bubble accents.
A cauldron is one of the few Halloween motifs that gives you two things to play with at once: the heavy black pot, and whatever is bubbling inside it. That second element is where the fun lives — acid green, glowing purple, molten orange, or a translucent jelly brew that looks genuinely liquid. These 18 witch cauldron nail art designs cover the whole range, from a single hair-thin outline you could wear to a client meeting, to full three-finger scenes with steam curling across your knuckles.
Quick Takeaways
• Shape: Almond and coffin give the cauldron a proper rounded canvas; short squoval works for minimal versions.
• Colors: Charcoal, cream, plum, bone white and deep teal as bases, with acid green, violet and amber brews.
• Finishes: Matte cauldron bodies against glossy brews create the strongest contrast.
• Accents: Rising bubbles, steam swirls, wooden spoons, glow pigment and 3D bead bubbles.
• Vibe: Storybook witch rather than gore — the brew colour sets the entire mood.
1. Bubbling Acid Green Brew on Charcoal
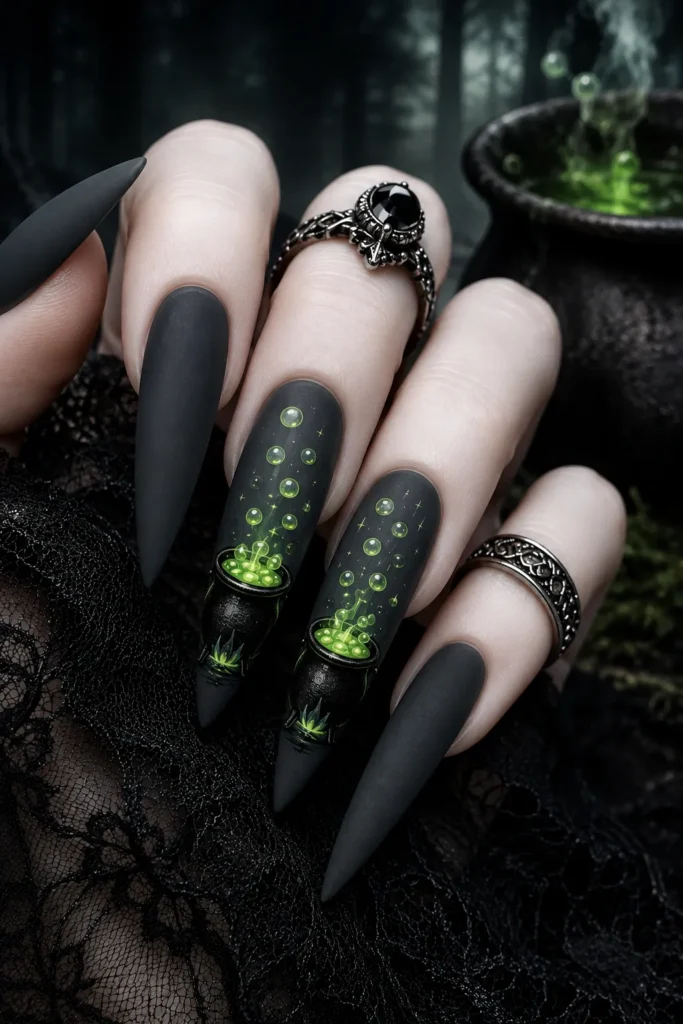
The definitive cauldron design. A wide black pot sitting low on the nail, filled with a band of acid green, with three bubbles rising off the surface. It reads instantly at arm’s length.
• Best for: Halloween, first attempts, everyday spooky wear.
• Nail shape: Almond or coffin.
• Length: Medium.
• Finish: Matte base, glossy brew.
• Skill level: Beginner to intermediate.
• Tools/products needed: Charcoal gel, black gel paint, acid green gel paint, fine liner, matte and gloss top coats.
Steps:
– Base all nails in charcoal.
– Paint a wide black oval across the lower third of two accent nails, flattening the bottom slightly.
– Add a curved band of acid green sitting on the pot’s rim so it looks like it’s filled to the brim.
– Dot three green bubbles rising above at different heights, then matte the pot and gloss the brew.
• Drying/curing time: 2–3 minutes (regular), 60 seconds (gel).
• Lasts: 5–7 days (regular), 2–3 weeks (gel).
• Aftercare tip: Matte charcoal shows body oils — wipe with alcohol on a lint-free pad weekly.
• Common mistake: Painting the pot too small and too high, which makes it look like a floating bowl.
2. Cast Iron Cauldron with Copper Rim on Cream
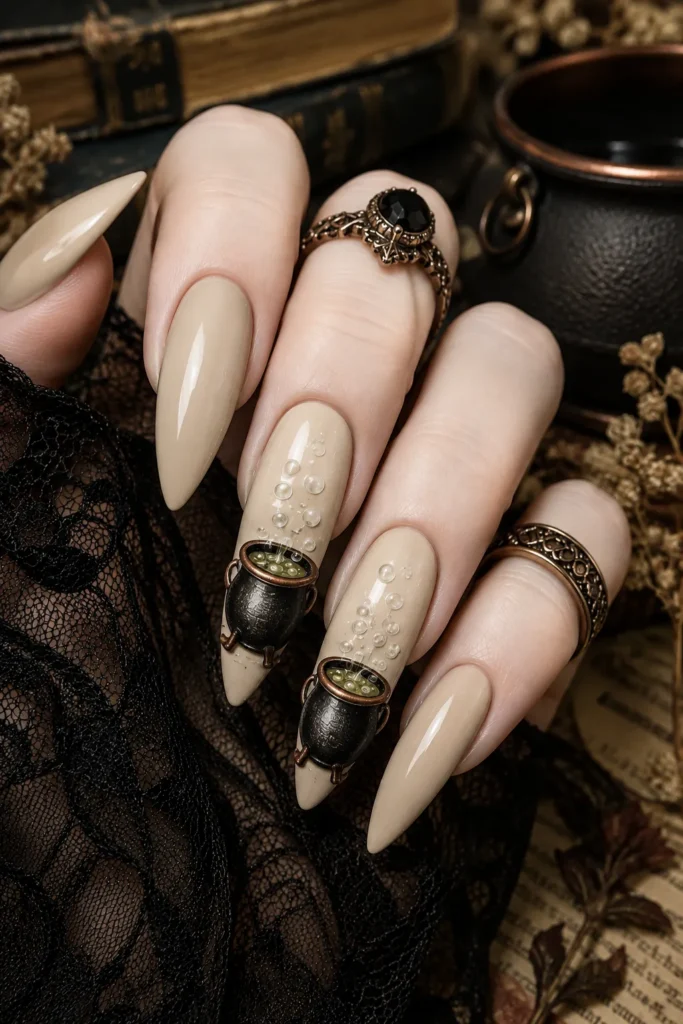
A more realistic take. The pot gets grey highlights along one edge to suggest curved iron, and a copper band around the rim catches the light. It looks like an illustration rather than a doodle.
• Best for: Autumn, cottage-witch styling, art lovers.
• Nail shape: Almond.
• Length: Medium.
• Finish: Satin.
• Skill level: Intermediate.
• Tools/products needed: Warm cream gel, black and mid-grey gel paints, copper liner, fine brush, satin top coat.
Steps:
– Base all nails in warm cream.
– Paint a black cauldron with three small legs at the bottom.
– Add a thin mid-grey curve along the left side of the pot for a lit edge.
– Trace the rim in copper, add two small copper handle loops, then satin top coat.
• Drying/curing time: 60 seconds per gel layer.
• Lasts: 2–3 weeks.
• Aftercare tip: Copper liner dulls under hand sanitiser — apply it to palms first.
• Common mistake: Highlighting both sides of the pot, which flattens the curve instead of rounding it.
3. Cauldron Silhouette in Negative Space
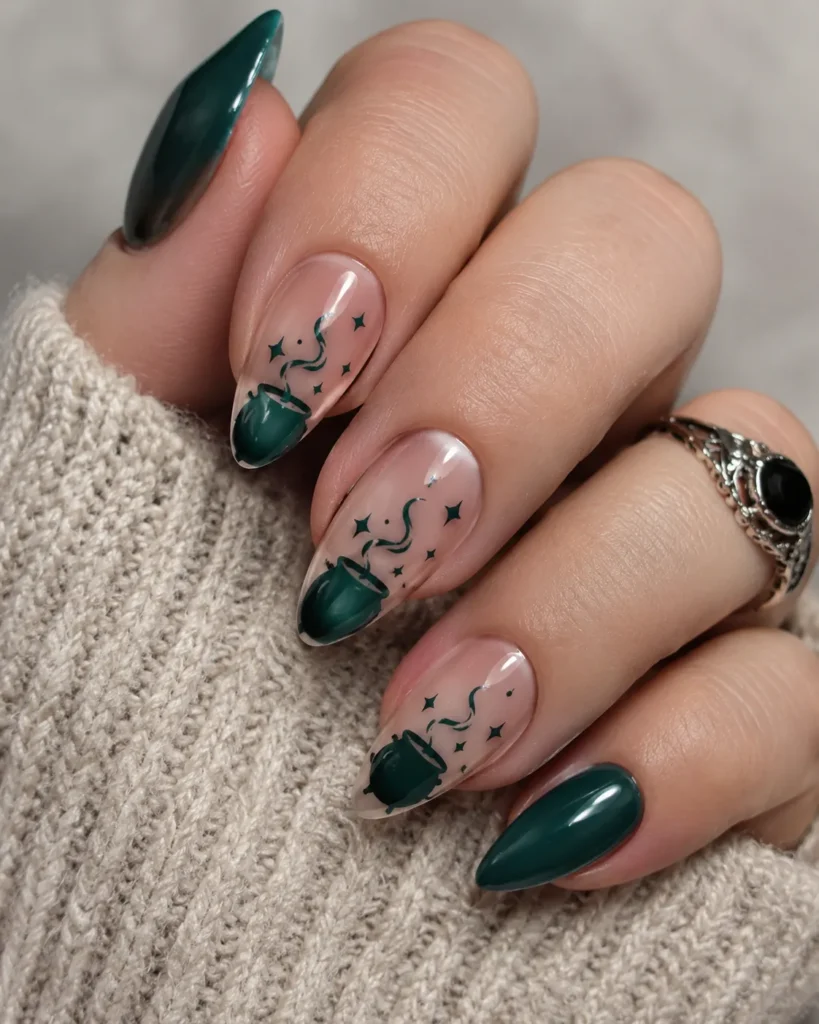
The cauldron isn’t painted — it’s the bare nail showing through a painted surround. Crisp, modern and a genuinely different way to use the motif.
• Best for: Modern minimalists, medium nails.
• Nail shape: Squoval.
• Length: Medium.
• Finish: Matte.
• Skill level: Intermediate to pro.
• Tools/products needed: Clear base, dusty teal gel, fine brush, cleanup brush with remover, matte top coat.
Steps:
– Apply a clear base coat to all nails and cure.
– On one nail, outline a cauldron shape in dusty teal, then fill everything around it.
– Keep the silhouette edges crisp — work the outline first, fill second.
– Tidy the sidewalls with a remover-dipped brush, then matte top coat.
• Drying/curing time: 60 seconds per layer.
• Lasts: 2–3 weeks.
• Aftercare tip: Use a strong base coat; the bare area needs protecting too.
• Common mistake: Filling first and scraping the cauldron out afterwards, which leaves ragged edges.
4. Minimalist Line-Art Cauldron on Bare Nails
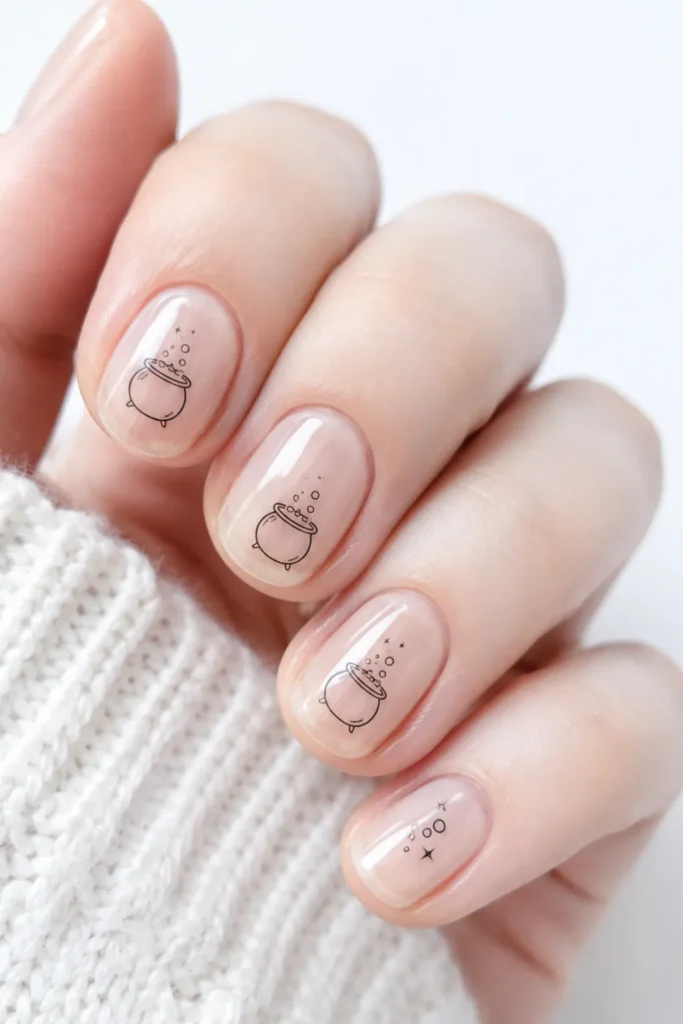
One continuous thin black line describing a cauldron, with two tiny bubbles above it, on an otherwise bare nail. This is the workplace-safe version.
• Best for: Office wear, minimalists, natural nails.
• Nail shape: Oval or squoval.
• Length: Short.
• Finish: Glossy clear.
• Skill level: Beginner.
• Tools/products needed: Clear base coat, black gel paint, 00 liner brush, top coat.
Steps:
– Clear base coat on all nails, cured.
– On two nails, draw a shallow U-shape with a straight rim line across the top.
– Add three tiny legs and two floating dots above the rim.
– Finish with a glossy top coat.
• Drying/curing time: 60 seconds.
• Lasts: 5–7 days on natural nails.
• Aftercare tip: Refresh the top coat every few days to protect such fine linework.
• Common mistake: Varying line thickness, which ruins the clean single-weight look.
5. Glow in the Dark Brew Cauldron
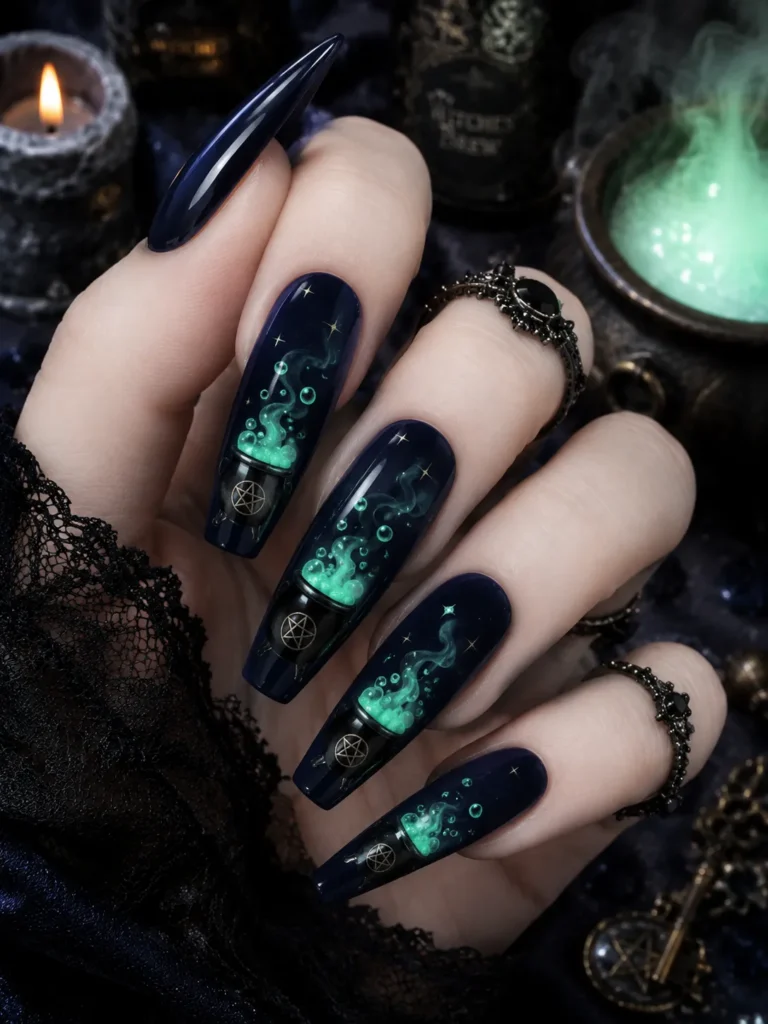
Daylight: a black pot with a pale mint brew on navy. Darkness: the brew glows and the pot vanishes into the background. The single best party trick in this article.
• Best for: Halloween nights, clubs, parties.
• Nail shape: Coffin or almond.
• Length: Medium.
• Finish: Glossy.
• Skill level: Intermediate.
• Tools/products needed: Deep navy gel, black gel paint, white gel paint, glow-in-the-dark gel, fine brush, clear top coat.
Steps:
– Base all nails in deep navy, then paint a black cauldron on two accents.
– Lay a thin white underlayer where the brew will sit — glow pigment needs a light base.
– Apply three coats of glow gel over the white, curing between each.
– Add glow bubbles rising above, then clear glossy top coat only; matte dims the glow.
• Drying/curing time: 60 seconds per glow coat.
• Lasts: 2–3 weeks.
• Aftercare tip: Charge under a bright lamp for 30 seconds before heading out.
• Common mistake: Applying glow paint directly onto black, which produces a barely visible fizzle.
6. Overflowing Violet Potion French Tip
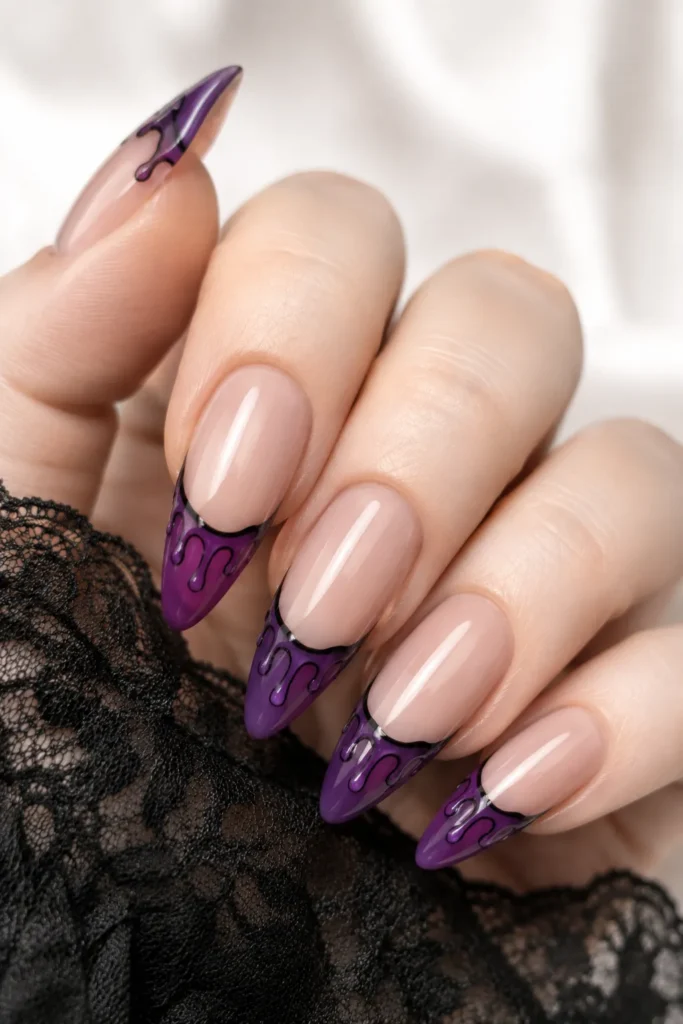
The French line becomes the brew: a violet tip that spills downward in three uneven drips, with a small black cauldron rim drawn along the free edge. Subtle enough for work.
• Best for: Office Halloween, French manicure fans.
• Nail shape: Almond.
• Length: Medium.
• Finish: Glossy.
• Skill level: Intermediate.
• Tools/products needed: Sheer nude gel, violet gel paint, black liner, French brush, top coat.
Steps:
– Base every nail in sheer nude.
– Paint a violet French tip with a slightly deeper curve than standard.
– Pull three uneven drips down from the smile line, rounding each end.
– Draw a thin black rim line along the very free edge, then top coat.
• Drying/curing time: 60 seconds per layer.
• Lasts: 2 weeks.
• Aftercare tip: Cap the free edge on every coat — coloured tips chip first.
• Common mistake: Drips of matching length, which look mechanical rather than spilled.
7. Tiny Cauldron Accent on Sheer Nude

One 4mm cauldron placed off-centre on a single sheer nail, with nine plain nails around it. Maximum restraint, minimum effort.
• Best for: Subtle Halloween, professional settings, short nails.
• Nail shape: Almond or round.
• Length: Short.
• Finish: Glossy.
• Skill level: Beginner.
• Tools/products needed: Warm taupe gel, sheer nude gel, black gel paint, fine brush, top coat.
Steps:
– Base nine nails in warm taupe and one in sheer nude.
– On the sheer nail, paint a miniature black cauldron no larger than 4mm.
– Add one tiny bubble above it and nothing else.
– Top coat all ten.
• Drying/curing time: 60 seconds per layer.
• Lasts: 2–3 weeks.
• Aftercare tip: The taupe nails will show regrowth before the sheer accent does.
• Common mistake: Centring the cauldron perfectly, which looks stiff; slightly off-centre is better.
8. Cauldron with 3D Bubble Beads

Painted pot, real bubbles. Clear micro-beads set above the brew give genuine height, so the bubbles catch light and cast tiny shadows.
• Best for: Texture lovers, parties, photos.
• Nail shape: Coffin or almond.
• Length: Medium to long.
• Finish: Matte base with 3D accents.
• Skill level: Intermediate.
• Tools/products needed: Plum gel, black gel paint, amber gel paint, clear micro-beads, gel glue, tweezers, matte top coat.
Steps:
– Base all nails in plum and paint a black cauldron with an amber brew on one accent.
– Matte top coat the nail and cure fully.
– Place three or four clear micro-beads above the brew in dots of gel glue, at different heights.
– Cure; top coat around the beads, never over them.
• Drying/curing time: 60 seconds per layer; 30 seconds per bead set.
• Lasts: 2 weeks — expect to lose the odd bead.
• Aftercare tip: Keep spare beads and glue at home for a two-minute repair.
• Common mistake: Flooding the beads with top coat, which dulls their glassiness.
9. Chrome Cauldron on Matte Plum
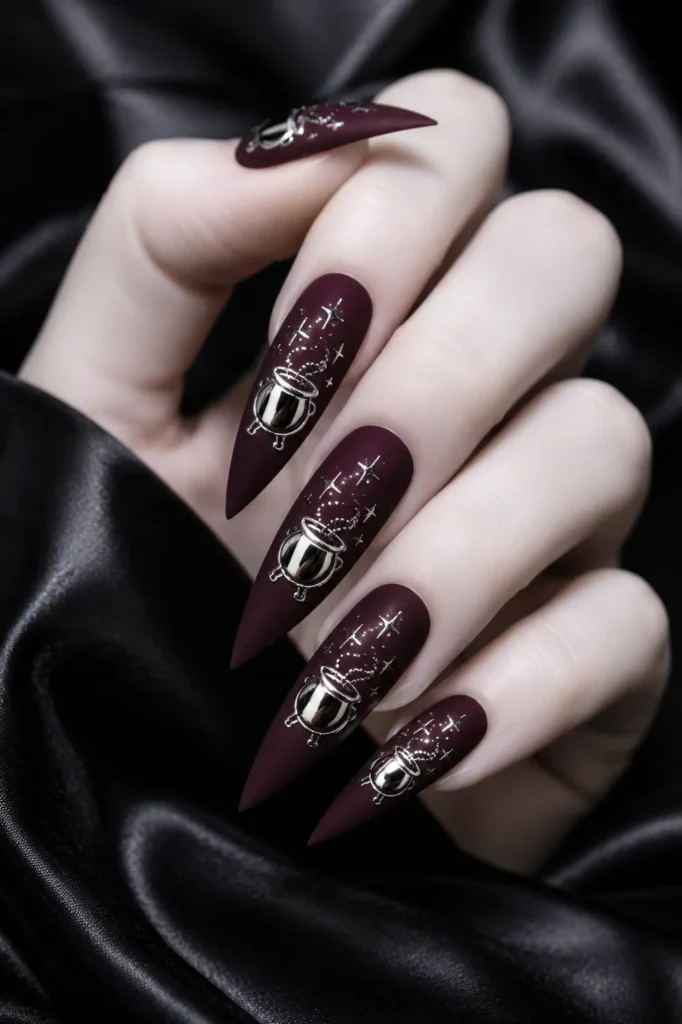
A mirror-silver cauldron silhouette on flat matte plum — no brew, no bubbles, just the shape in liquid metal. The most grown-up design here.
• Best for: Evening events, minimalists who want metallics.
• Nail shape: Almond or coffin.
• Length: Medium.
• Finish: Matte base, chrome art.
• Skill level: Pro.
• Tools/products needed: Plum gel, no-wipe top coat, silver chrome powder, sponge applicator, fine brush, matte top coat.
Steps:
– Base in plum and cure.
– Paint the cauldron silhouette in no-wipe top coat and cure fully.
– Buff silver chrome powder over the shape until mirror-bright, then dust off the excess.
– Seal the chrome with clear, then matte top coat the surrounding plum.
• Drying/curing time: 60 seconds per layer.
• Lasts: 2–3 weeks.
• Aftercare tip: Chrome scratches — wear gloves for washing up.
• Common mistake: Chrome dust drifting onto the plum, leaving a metallic haze.
10. Cauldron Steam Swirl Wrapping the Nail
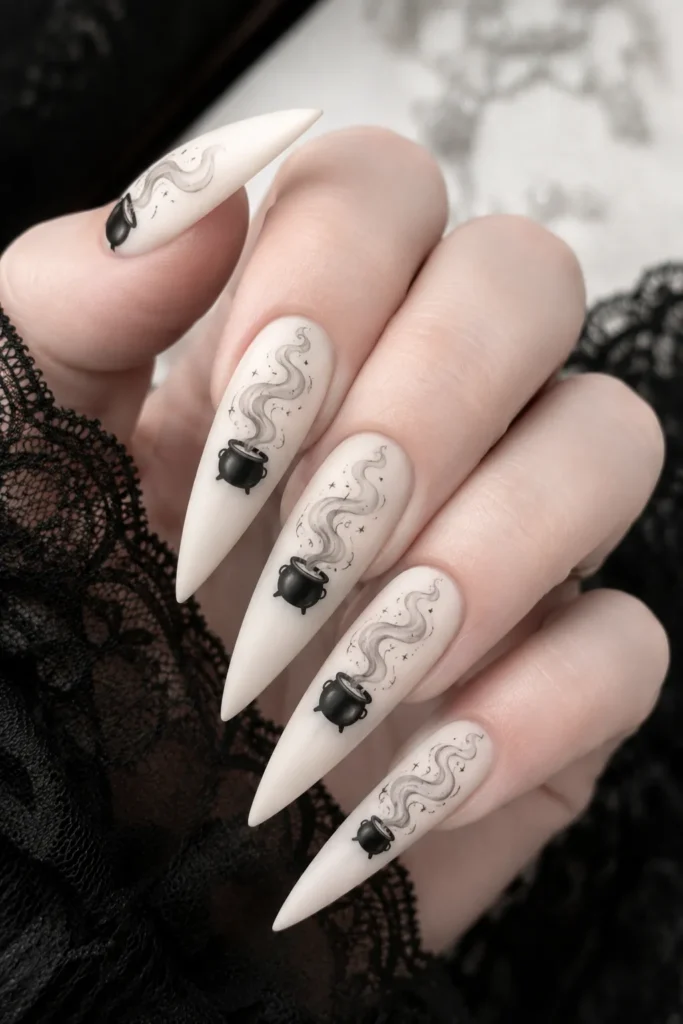
The pot sits small at the base and the steam does the work — one continuous grey swirl spiralling up the nail and curling over the free edge. Elegant and unexpected.
• Best for: Long nails, minimalists, artistic sets.
• Nail shape: Almond or stiletto.
• Length: Long.
• Finish: Matte.
• Skill level: Intermediate to pro.
• Tools/products needed: Bone white gel, black gel paint, pale grey paint, long liner brush, matte top coat.
Steps:
– Base all nails in bone white.
– Paint a small black cauldron at the very base of two accent nails.
– Draw one continuous pale grey swirl rising from the pot, looping twice before curling over the tip.
– Vary the swirl’s thickness as it rises, then matte top coat both surfaces.
• Drying/curing time: 60 seconds per layer.
• Lasts: 2–3 weeks.
• Aftercare tip: Painting over the free edge doubles the wear life of tip art.
• Common mistake: A swirl of even width, which reads as a squiggle rather than steam.
11. Cauldron Over Flames on Amber Gradient
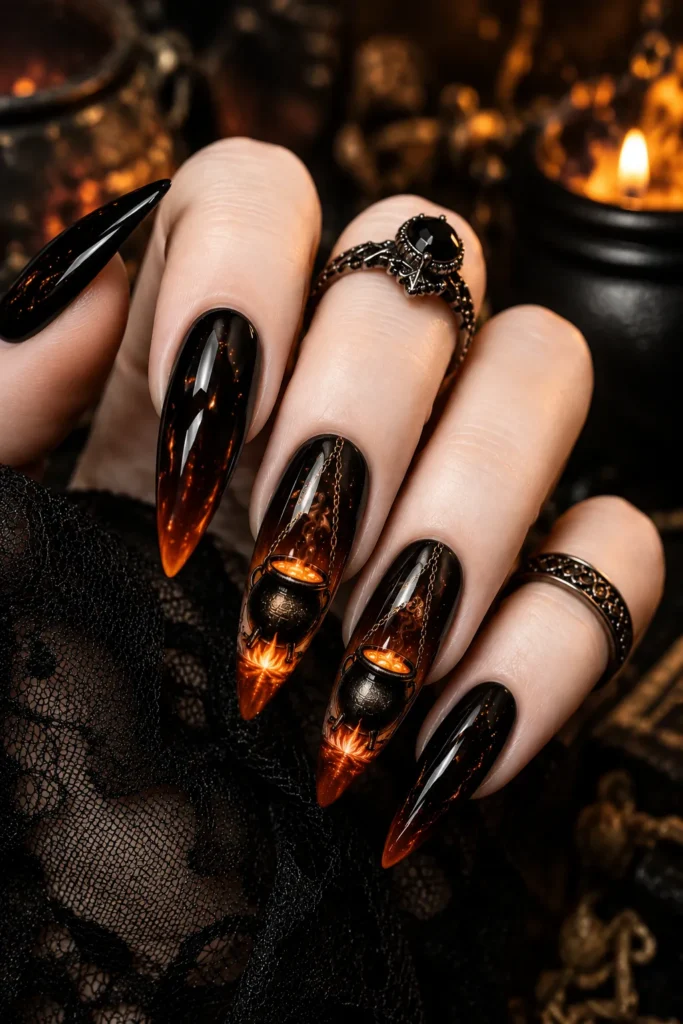
An amber-to-black gradient sits beneath the pot so it looks like it’s suspended over a fire, with orange flame licks reaching up the sides. Warm and genuinely atmospheric.
• Best for: Halloween, autumn, gradient lovers.
• Nail shape: Coffin.
• Length: Medium to long.
• Finish: Glossy.
• Skill level: Pro.
• Tools/products needed: Black gel, amber and orange gel paints, makeup sponge, black liner, fine brush, top coat.
Steps:
– Base all nails in black and cure.
– Sponge amber into the lower third of two nails in light passes, fading upward.
– Paint a solid black cauldron sitting over the amber zone.
– Add three orange flame licks curling up around the pot’s base, then glossy top coat.
• Drying/curing time: 60 seconds per sponged layer.
• Lasts: 2–3 weeks.
• Aftercare tip: Gloss is essential — matte flattens the fire glow.
• Common mistake: Painting flames as sharp triangles instead of curved, tapering licks.
12. Pastel Cauldron in Sage and Cream
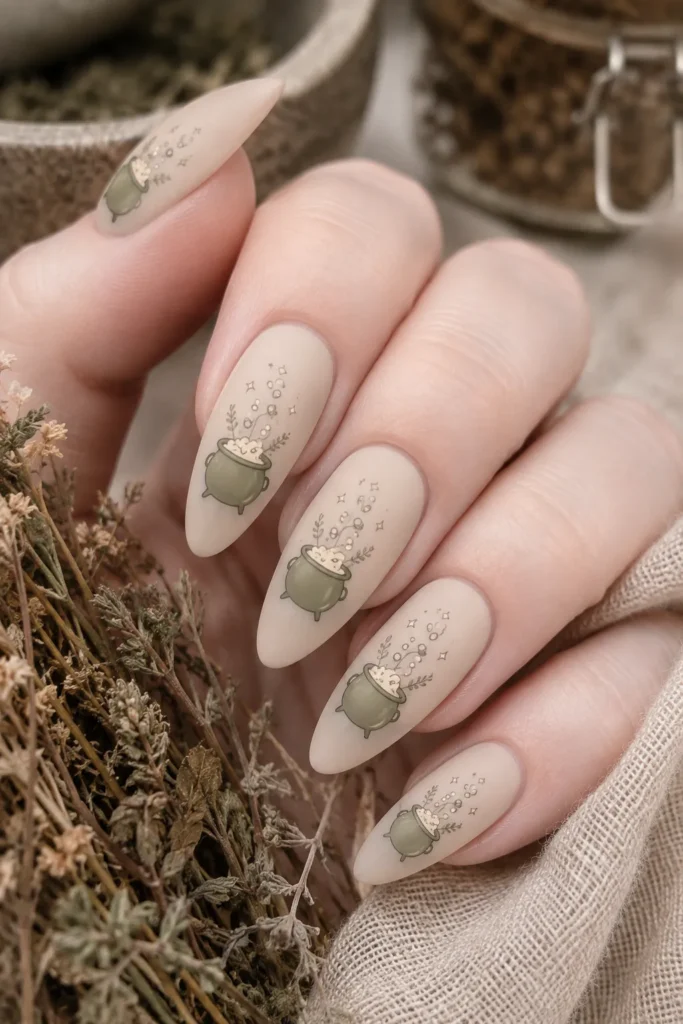
The soft version. A sage green pot with a cream brew on an oat base — recognisably a cauldron, but sweet enough to wear in September.
• Best for: Early autumn, soft palettes, office wear.
• Nail shape: Round or squoval.
• Length: Short.
• Finish: Matte.
• Skill level: Beginner.
• Tools/products needed: Oat gel, sage green gel paint, cream paint, fine brush, matte top coat.
Steps:
– Base all nails in oat.
– Paint a sage green cauldron on two accent nails, keeping the edges soft.
– Add a cream brew band and two cream bubbles above.
– Matte top coat.
• Drying/curing time: 60 seconds per layer.
• Lasts: 2–3 weeks.
• Aftercare tip: Muted pastels grow out subtly, so this set stretches to three weeks.
• Common mistake: Using a sage that’s too close to the oat base, which loses all contrast.
13. Cauldron with Gold Star Sparks
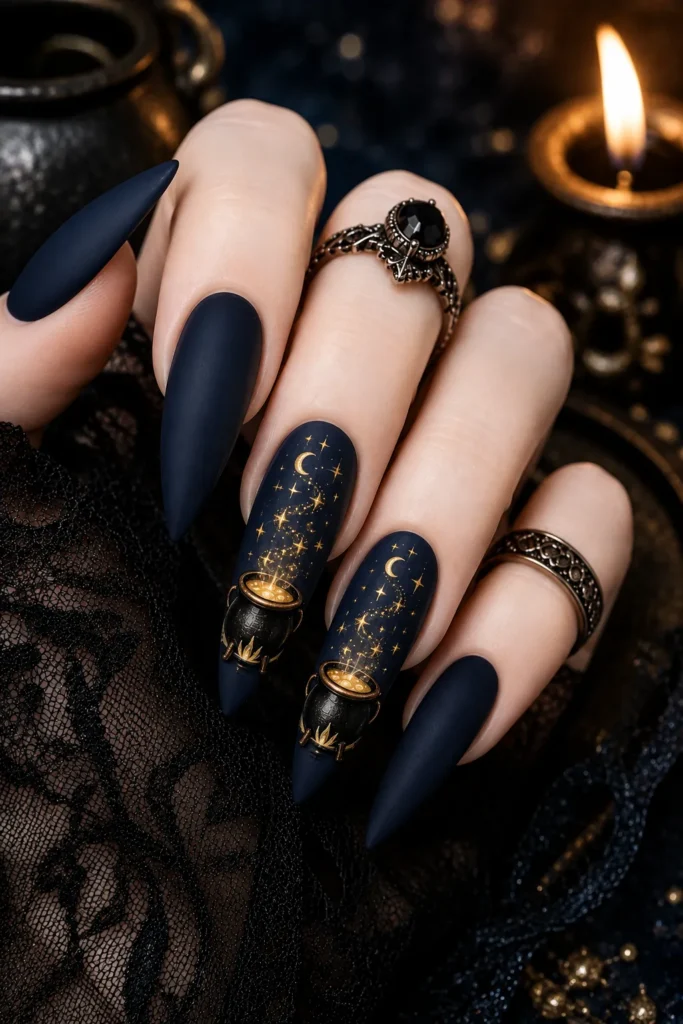
Instead of bubbles, gold four-point sparks fly up out of the brew. It shifts the whole design from spooky toward magical, and it photographs beautifully.
• Best for: Evening events, celestial-witch styling.
• Nail shape: Almond.
• Length: Medium.
• Finish: Matte base, metallic accents.
• Skill level: Intermediate.
• Tools/products needed: Ink navy gel, black gel paint, gold liner paint, fine brush, matte top coat.
Steps:
– Base all nails in ink navy.
– Paint a black cauldron low on two accent nails with a gold rim.
– Scatter five or six gold four-point stars rising above the pot, smallest at the top.
– Connect two with a hair-thin gold trail, then matte top coat.
• Drying/curing time: 60 seconds per layer.
• Lasts: 2–3 weeks.
• Aftercare tip: Gold detail dulls with sanitiser; refresh top coat at day 10.
• Common mistake: Stars of equal size, which flattens the sense of distance.
14. Stamped Cauldron Repeat Pattern
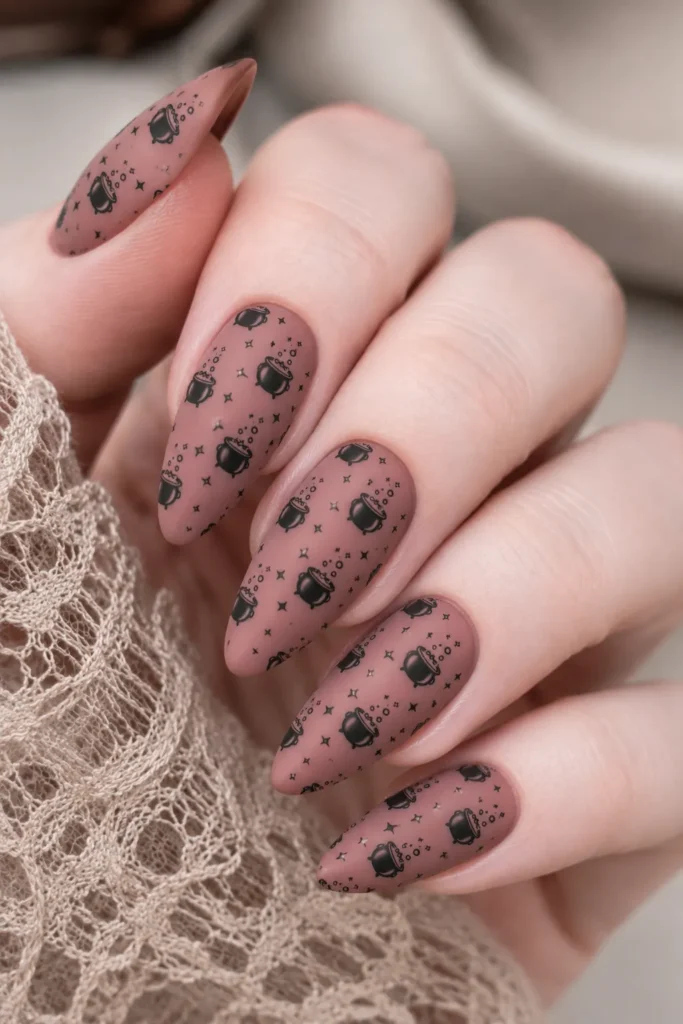
Small cauldrons stamped in a repeating pattern across every nail. It’s the fastest way to get a full, even design and it needs no drawing skill at all.
• Best for: Beginners wanting full coverage, fast manicures.
• Nail shape: Any.
• Length: Short to medium.
• Finish: Matte.
• Skill level: Intermediate (stamping).
• Tools/products needed: Dusty rose gel, black stamping polish, a Halloween stamping plate with cauldrons, silicone stamper, scraper, matte top coat.
Steps:
– Base all nails in dusty rose, two coats, cured.
– Flood the cauldron section of the plate with black stamping polish and scrape in one clean pass.
– Roll the stamper across the plate, then roll it onto the nail — never press straight down.
– Clean the sidewalls with a remover-dipped brush, then matte top coat.
• Drying/curing time: 60 seconds per layer.
• Lasts: 2–3 weeks.
• Aftercare tip: One thick top coat protects stamped art better than two thin ones.
• Common mistake: Scraping at the wrong angle, which pulls polish out of the etched lines.
15. Cauldron and Wooden Spoon Scene
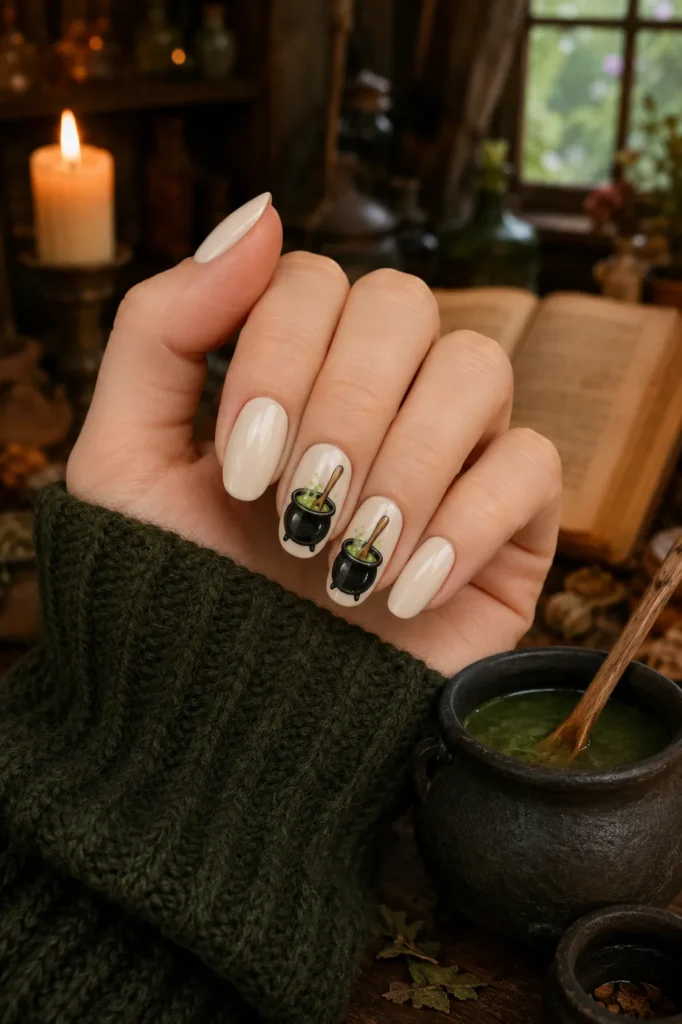
A pot with a wooden spoon resting at an angle inside it, complete with a grain line down the handle. The added object makes the whole thing feel like a moment rather than an icon.
• Best for: Illustrative nail art fans, cottage-witch styling.
• Nail shape: Coffin or almond.
• Length: Long.
• Finish: Satin.
• Skill level: Pro.
• Tools/products needed: Cream gel, black gel paint, two brown paints, deep green paint, fine liner, satin top coat.
Steps:
– Base all nails in cream.
– Paint a black cauldron with a deep green brew on one accent nail.
– Lay a mid-brown spoon handle at a 40° angle rising out of the pot.
– Add a darker brown grain line down the handle and a small oval bowl at the submerged end, then satin top coat.
• Drying/curing time: 60 seconds per layer.
• Lasts: 2–3 weeks.
• Aftercare tip: Satin suits illustrative art better than high gloss.
• Common mistake: A vertical spoon, which looks like a stick; the angle is what sells it.
16. Jelly Cauldron Cross-Section

A translucent jelly cauldron with three visible layers of brew inside — amber at the bottom, violet in the middle, mint on top. It looks like a glass vessel, which is unexpectedly beautiful.
• Best for: Jelly nail fans, art lovers, statement sets.
• Nail shape: Almond or coffin.
• Length: Medium.
• Finish: Glossy jelly.
• Skill level: Pro.
• Tools/products needed: Clear base, sheer amber, violet and mint jelly gels, black liner, fine brush, glossy top coat.
Steps:
– Clear base coat, cured.
– Outline a cauldron shape in thin black on one accent nail.
– Fill the lower third with sheer amber, the middle with violet and the top with mint, curing between each so they don’t bleed.
– Add a black rim line and two glossy top coats for depth.
• Drying/curing time: 60 seconds per layer.
• Lasts: 2 weeks.
• Aftercare tip: Gloss is non-negotiable — matte destroys the translucency.
• Common mistake: Using opaque colours, which loses the glass cross-section effect entirely.
17. Cauldron Trio Across Three Fingers

One cauldron per finger across the index, middle and ring, each with a different coloured brew and each slightly larger than the last. It reads as a sequence when the hand is flat.
• Best for: Photos, content creators, statement sets.
• Nail shape: Squoval or almond.
• Length: Medium.
• Finish: Matte.
• Skill level: Intermediate to pro.
• Tools/products needed: Dove grey gel, black gel paint, green, violet and amber paints, fine brush, matte top coat.
Steps:
– Base all nails in dove grey.
– Paint a small cauldron on the index, medium on the middle, large on the ring finger.
– Fill each with a different brew — green, violet, amber — and give each two rising bubbles.
– Leave thumb and little finger plain, then matte top coat.
• Drying/curing time: 60 seconds per layer.
• Lasts: 2–3 weeks.
• Aftercare tip: The plain nails wear longest; repaint accents first when touching up.
• Common mistake: Sizing all three identically, which loses the sequence.
18. Blood-Red Brew Cauldron on Bone White
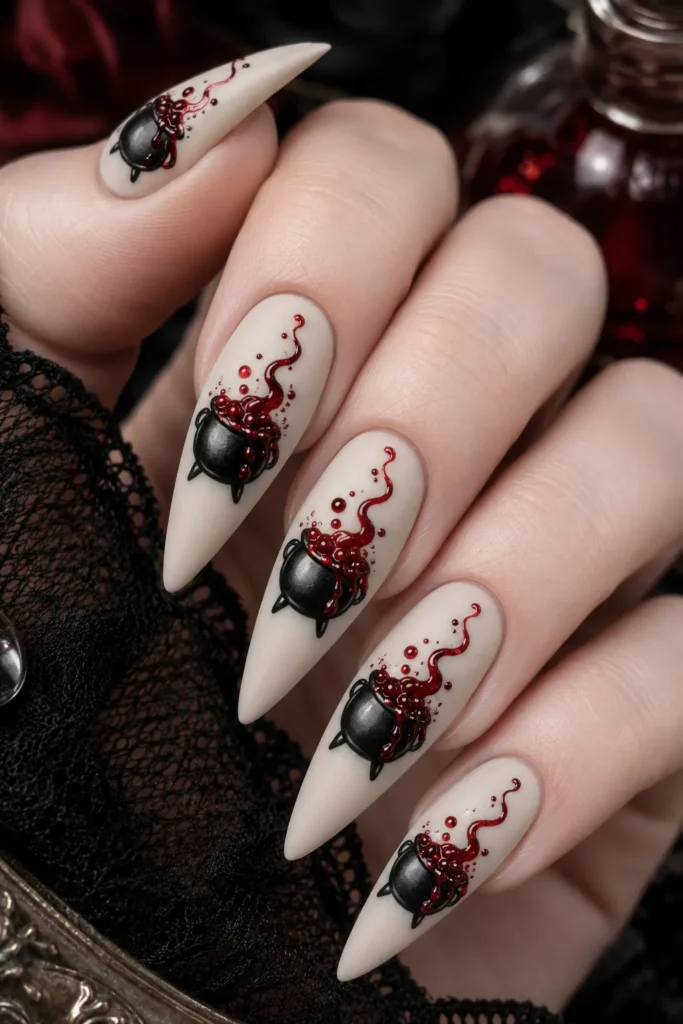
A high-contrast version: a matte black pot with a deep crimson brew spilling over the rim in two short drips, on flat bone white. The starkest design here.
• Best for: Halloween night, high-contrast lovers.
• Nail shape: Coffin or squoval.
• Length: Medium.
• Finish: Matte base, glossy brew.
• Skill level: Intermediate.
• Tools/products needed: Bone white gel, black gel paint, deep crimson paint, fine brush, matte and gloss top coats.
Steps:
– Base all nails in bone white, two thin coats.
– Paint a wide matte black cauldron across the lower half of two accent nails.
– Add a crimson brew band and let two uneven drips run over the rim and down the pot.
– Matte the white and the pot; gloss the crimson only.
• Drying/curing time: 60 seconds per layer.
• Lasts: 2–3 weeks.
• Aftercare tip: Bone white shows dirt at the free edge — wash with a mild soap.
• Common mistake: Drips of matching length, which look drawn rather than spilled.
Conclusion
Witch cauldron nail art works because the shape is forgiving — a wide, slightly flattened oval with a rim line reads as a cauldron even when your hand wobbles. What separates a good set from a flat one is the brew: pick a colour that contrasts hard with the pot, keep the bubbles uneven, and let one accent nail carry the scene rather than crowding all ten.
• Place the pot low on the nail; a floating cauldron never looks right.
• The brew colour sets the mood — acid green for classic, violet for magical, crimson for gothic.
• Uneven bubble heights and sizes create depth without any shading.
• Matte pot against a glossy brew is the strongest two-finish combination.
• One or two accent nails beat a full set of ten cauldrons every time.
Grouped Picks
• Best for Everyday: Minimalist Line-Art Cauldron on Bare Nails, Tiny Cauldron Accent on Sheer Nude, Pastel Cauldron in Sage and Cream.
• Best for Party: Glow in the Dark Brew Cauldron, Chrome Cauldron on Matte Plum, Cauldron Over Flames on Amber Gradient.
• Best for Beginners: Bubbling Acid Green Brew on Charcoal, Stamped Cauldron Repeat Pattern, Blood-Red Brew Cauldron on Bone White.
Frequently Asked Questions
Q1. How do I paint a cauldron shape that actually looks like a cauldron?
A: Start with a wide oval, flatten the bottom slightly, and add a straight rim line across the top that extends a fraction wider than the pot. The overhanging rim is what makes it read correctly.
Q2. Where on the nail should the cauldron sit?
A: In the lower half, close to the free edge. Placed centrally or high it looks like a floating bowl rather than a pot sitting on the ground.
Q3. What colour brew looks best?
A: Acid green is the most recognisable, violet reads more magical, and deep crimson reads gothic. Whichever you pick, it needs to contrast strongly with the black pot.
Q4. Can I do witch cauldron nail art on short nails?
A: Yes — use the minimalist line-art or tiny accent versions. Full scenes with steam and spoons need medium to long nails to avoid crowding.
Q5. Why doesn’t my glow-in-the-dark brew glow properly?
A: Glow pigment needs a white underlayer and at least three coats. Applied thinly over a black pot, it will barely register in the dark.
Q6. How do I paint bubbles that look like they’re rising?
A: Vary both size and spacing — largest and closest together near the brew, smallest and furthest apart as they rise. Even, matching dots look like a pattern instead.
Q7. What brush should I use for the cauldron outline?
A: A short round brush for the pot body and a 00 liner for the rim, legs and bubbles. A liner alone makes filling the body slow and streaky.
Q8. How long will cauldron nail art last?
A: Two to three weeks in gel, five to seven days in regular polish. Detailed elements like steam and bubbles wear first, so refresh the top coat around day 10.
Tasleem akhtar
- Fresh nail designs and ideas for every mood and occasion
- Seasonal trends from summer brights to festive nails
- And much more to keep your nails healthy and beautiful

The Conversation
Your voice matters. Discussions are moderated for civility.